
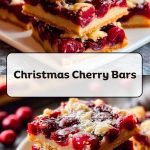
With their vibrant red filling and buttery shortbread-style layers, Christmas Cherry Bars are the kind of dessert that looks like holiday cheer in edible form. These gooey cherry-studded squares are perfect for winter gatherings, cookie exchanges, or simply cozy nights with a mug of cocoa. The sweet-tart cherry pie filling sandwiched between tender vanilla crusts gives you a luscious bite every time.

What makes them extra special is their festive flair without the fuss. You won’t need fancy tools or complex techniques to get a show-stopping dessert. Whether you’re baking ahead for a party or need something last-minute, these cherry bars come together quickly and slice beautifully. Their simplicity is part of their charm.
Why You’ll Love This Christmas Cherry Bars Recipe
These bars are the epitome of easy holiday baking. They bring together a few basic pantry staples to create something that tastes bakery-worthy. They hold their shape when cut, travel well, and stay fresh for days – a win for gifting or potlucks. Plus, that juicy cherry center never fails to grab attention!
What Kind of Cherry Pie Filling Should I Use?
You can use any canned cherry pie filling you prefer. Classic sweet cherry is always a hit, but if you want a little more zing, try a tart cherry blend. Just make sure the filling is thick and not watery, so it doesn’t make the crust soggy. If you’re feeling ambitious, homemade cherry pie filling is a delightful upgrade.
Ingredients for the Christmas Cherry Bars
Each ingredient in these bars plays a role in balancing flavor and texture. Let’s look at what you’ll need:
- Unsalted Butter: This is the base of your crust. It adds richness and helps everything hold together while baking into a golden, tender bite.
- Granulated Sugar: Brings sweetness to the dough and balances the tartness of the cherries.
- Eggs: Add structure and richness, helping the crust set up properly.
- Vanilla Extract: Adds warmth and depth of flavor.
- All-Purpose Flour: Forms the bulk of the dough and creates that firm but tender base.
- Salt: Just a pinch helps enhance all the other flavors.
- Cherry Pie Filling: The star of the show! Bright, juicy, and colorful.
- Almond Extract (optional): A tiny splash adds a wonderful cherry-almond bakery note that pairs beautifully with the filling.
How To Make the Christmas Cherry Bars
Step 1: Cream the Butter and Sugar
Start by beating the butter and sugar together until light and fluffy. This creates air in the dough, helping the base bake up tender.
Step 2: Add the Eggs and Flavorings
Beat in the eggs one at a time, then add the vanilla extract (and almond, if using). Mix until smooth.
Step 3: Add the Dry Ingredients
Gradually mix in the flour and salt until the dough comes together. It will be thick and slightly sticky.
Step 4: Layer the Dough
Spread about two-thirds of the dough into a greased 9×13-inch baking dish. Smooth it out to cover the bottom evenly.
Step 5: Add the Cherry Filling
Spoon the cherry pie filling over the base layer, spreading it gently to cover.
Step 6: Top with Remaining Dough
Drop small spoonfuls of the remaining dough across the top of the cherry filling. It won’t cover completely – that’s okay! The cherries should peek through.
Step 7: Bake Until Golden
Bake at 350°F (175°C) for 35–40 minutes or until the top is golden and set. Cool completely before slicing.
How to Serve and Store These Cherry Bars
These Christmas Cherry Bars slice into clean, beautiful squares and make a stunning addition to any dessert spread. Serve them chilled or at room temperature, dusted with powdered sugar or even drizzled with a simple glaze.
They keep well in an airtight container at room temperature for up to 3 days or refrigerated for up to a week. You can also freeze them in layers with parchment paper for up to 3 months. This recipe yields 20 to 24 squares, depending on how you cut them, making it perfect for feeding a crowd.
What to Serve With Christmas Cherry Bars?
Hot Chocolate
A rich cup of cocoa makes the cherry flavor pop even more.
Eggnog
The creamy, spiced drink complements the tartness of the cherries.
Peppermint Tea
A light and refreshing pairing to balance the sweetness.
Vanilla Ice Cream
Serve bars slightly warm with a scoop of ice cream for a dreamy dessert.
Mulled Wine
For an adult twist, this warm spiced drink is a cozy combo.
Whipped Cream
Just a dollop turns each square into a mini cherry shortcake.
Coffee or Espresso
Perfect for a holiday brunch or after-dinner treat.
Want More Bar Dessert Ideas?
If you adore these Christmas Cherry Bars, you’ll definitely want to try some of our other irresistible bar recipes:
- Peach Cobbler Crumble Bars for a summery stone fruit twist.
- Knock You Naked Bars if you’re craving gooey, chocolatey indulgence.
- Easy Apple Crisp Bars for cozy cinnamon-apple flavor.
- Lemon Raspberry Swirl Cheesecake Cups for a tangy creamy bite.
- Cherry Chocolate Cheesecake if you’re a fan of cherry and chocolate together.
Save This Pin For Later
📌 Save this recipe to your Pinterest holiday board so you can revisit it all season long.
And I’d love to hear from you! Did you keep it classic or add a personal spin? Maybe swapped in a different fruit? Leave a comment below with your version — your creativity inspires everyone.
Explore beautifully curated desserts and festive bakes on NoraNosh Recipes on Pinterest and discover your next holiday baking obsession!
Print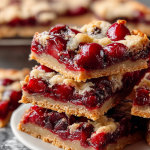
Christmas Cherry Bars
- Total Time: 55 minutes
- Yield: 24 bars
- Diet: Vegetarian
Description
If you need a holiday dessert that delivers on both looks and flavor, these Christmas Cherry Bars are the ultimate festive treat. With a buttery, tender vanilla crust and a vibrant layer of juicy cherry pie filling, they bring joy to any cookie platter or gathering. Whether you’re baking for a crowd or prepping ahead, these bars are as reliable as they are beautiful. Perfect for anyone searching for quick breakfast options, easy desserts, food ideas for parties, and colorful treats to share. Add this easy recipe to your Christmas baking list for a delicious win.
Ingredients
1 cup unsalted butter, softened
2 cups granulated sugar
4 large eggs
1 teaspoon vanilla extract
1/2 teaspoon almond extract (optional)
3 cups all-purpose flour
1/2 teaspoon salt
2 cans (21 ounces each) cherry pie filling
Instructions
1. Preheat oven to 350°F (175°C) and grease a 9×13-inch baking dish.
2. In a large bowl, cream together the butter and sugar until light and fluffy.
3. Add eggs one at a time, mixing well after each. Stir in vanilla and almond extract.
4. Gradually mix in flour and salt until dough forms.
5. Spread two-thirds of the dough into the prepared pan evenly.
6. Spoon the cherry pie filling evenly over the dough.
7. Drop small spoonfuls of the remaining dough over the cherries.
8. Bake for 35–40 minutes until top is lightly golden.
9. Let cool completely before slicing into squares.
10. Store in an airtight container or refrigerate for longer freshness.
Notes
Let the bars cool completely before cutting to get clean slices.
Use parchment paper to lift out of the pan easily for serving or freezing.
- Prep Time: 15 minutes
- Cook Time: 40 minutes
- Category: Dessert
- Method: Baking
- Cuisine: American
Nutrition
- Serving Size: 1 bar
- Calories: 210
- Sugar: 19g
- Sodium: 70mg
- Fat: 9g
- Saturated Fat: 5g
- Unsaturated Fat: 4g
- Trans Fat: 0g
- Carbohydrates: 31g
- Fiber: 1g
- Protein: 2g
- Cholesterol: 45mg