


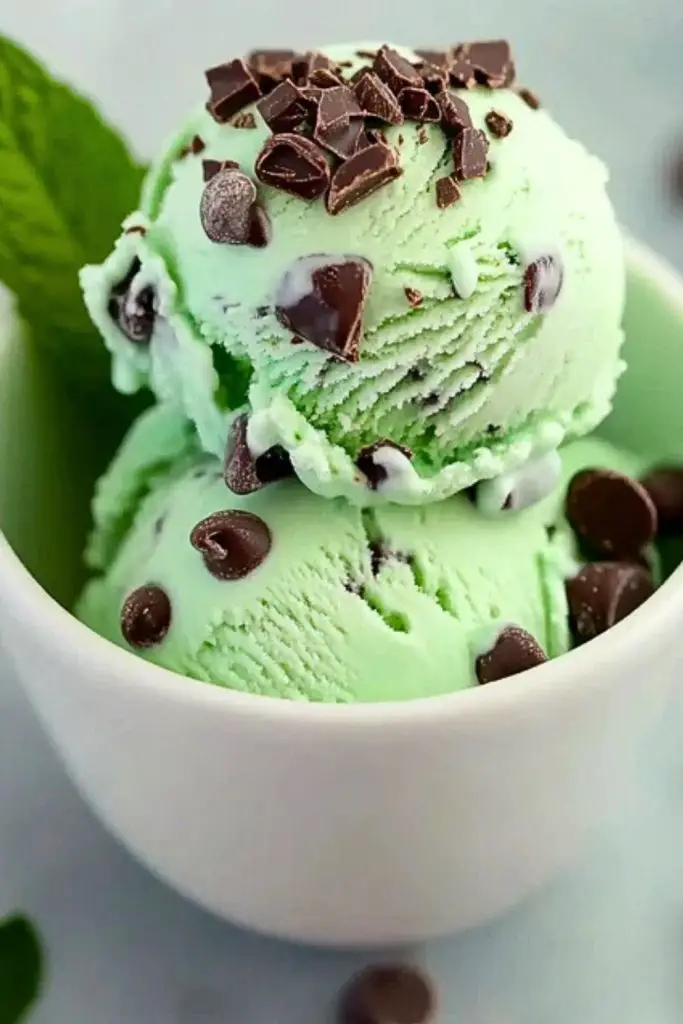
Cool, creamy, and undeniably refreshing, Mint Chocolate Chip Ice Cream is a timeless favorite that blends smooth minty sweetness with irresistible chocolate crunch. The pale green color and delightful specks of chocolate chips make every scoop visually enticing and satisfyingly textured. It’s a treat that feels both indulgent and rejuvenating, perfect for hot summer afternoons or as a minty finale to any meal.
What sets this homemade version apart is its rich creaminess and the fresh, clean flavor of real mint extract, paired with generous amounts of chocolate chunks that melt in your mouth. Unlike store-bought versions, this recipe gives you control over the ingredients and the intensity of flavors—so you can customize it to your perfect level of mintiness and chocolatey goodness.
Ingredients for Mint Chocolate Chip Ice Cream
- 2 cups heavy cream
- 1 cup whole milk
- ¾ cup granulated sugar
- 1½ teaspoons pure mint extract
- 1–2 drops green food coloring (optional, for that classic green hue)
- 1 cup semi-sweet chocolate chips or chopped dark chocolate
- A pinch of salt

Step 1: Prepare the Base
In a large mixing bowl, whisk together the heavy cream, whole milk, granulated sugar, and salt until the sugar is completely dissolved. This usually takes about 2–3 minutes of steady mixing. If using green food coloring, add it now and stir until the color is evenly distributed.
Step 2: Add the Mint Flavor
Stir in the pure mint extract. Start with 1½ teaspoons, taste the mixture, and adjust slightly if needed. Be cautious—mint extract is potent, and a little goes a long way.
Step 3: Chill the Mixture
Cover the bowl with plastic wrap and place it in the refrigerator for at least 2 hours, or until the mixture is thoroughly chilled. For best results, let it chill overnight. A cold base helps the ice cream churn more efficiently.
Step 4: Churn the Ice Cream
Once chilled, pour the mixture into your ice cream maker and churn according to the manufacturer’s instructions. This usually takes 20–25 minutes. During the last 5 minutes of churning, gradually add in the chocolate chips or chunks to evenly distribute them throughout.
Step 5: Freeze Until Firm
Transfer the churned ice cream into an airtight container. Use a spatula to smooth the top. Freeze for at least 4 hours, or until the ice cream is firm enough to scoop. Let it sit at room temperature for a few minutes before serving for easier scooping.
Estimated Nutrition (Per ½ Cup Serving)
- Calories: 280
- Total Fat: 18g
- Saturated Fat: 11g
- Cholesterol: 60mg
- Sodium: 45mg
- Total Carbohydrates: 28g
- Sugars: 24g
- Protein: 3g
(Note: Nutritional values are approximate and may vary depending on exact ingredients used.)
Frequently Asked Questions
What kind of mint extract should I use?
Use pure mint extract for the best flavor. Peppermint extract works too but has a sharper, cooler taste. Avoid artificial mint flavoring.
Can I make this without an ice cream maker?
Yes! Pour the chilled mixture into a loaf pan, freeze for 45 minutes, then stir vigorously. Repeat every 30 minutes for about 3 hours until creamy.
Is food coloring necessary?
Not at all. It’s optional and only adds the iconic green tint. The flavor stays the same without it.
Can I use dairy-free alternatives?
Yes, you can use coconut cream and almond or oat milk, but texture and flavor will vary slightly from the traditional version.
How do I make it chunkier?
Use chopped chocolate bars or larger chocolate chunks instead of standard chips for extra texture.
How long does it last in the freezer?
Homemade ice cream stays good for up to 2 weeks. After that, it may develop ice crystals and lose creaminess.
Can I reduce the sugar?
You can reduce the sugar slightly, but it affects the texture. Too little sugar may cause the ice cream to freeze too hard.
Can I add other mix-ins?
Absolutely! Crushed Oreos, brownie bits, or fudge swirls all pair wonderfully with the minty base.

Mint Chocolate Chip Ice Cream Recipe
- Total Time: 47 minute
- Yield: About 1 quart
Description
Looking for a cool, creamy dessert that’s both indulgent and refreshing? This homemade Mint Chocolate Chip Ice Cream is the perfect blend of smooth mint flavor and rich chocolate crunch. It’s one of those easy recipes that not only satisfies your sweet tooth but also makes you feel like you’re treating yourself to something special. Whether you’re craving quick dessert ideas, need a frozen treat for summer parties, or just love all things minty and chocolatey, this recipe checks all the boxes. The fresh mint flavor combined with velvety cream and crispy chocolate bits creates a spoonful of joy in every bite. Ideal for fans of easy dessert recipes, food ideas that impress, or simple joys like homemade ice cream.
Ingredients
2 cups heavy cream
1 cup whole milk
3/4 cup granulated sugar
1 1/2 teaspoons pure mint extract
1–2 drops green food coloring (optional)
1 cup semi-sweet chocolate chips or chopped dark chocolate
Pinch of salt
Instructions
- In a large bowl, whisk together the heavy cream, milk, sugar, and salt until sugar is dissolved.
- Add mint extract and food coloring (if using), then stir to combine.
- Cover and chill the mixture in the refrigerator for at least 2 hours or overnight.
- Pour chilled mixture into an ice cream maker and churn according to manufacturer’s instructions.
- In the last 5 minutes of churning, add the chocolate chips.
- Transfer to a freezer-safe container and freeze for at least 4 hours until firm.
- Let sit at room temperature for a few minutes before scooping.
- Prep Time: 10 minutes (plus chilling/freezing time)
- Freeze Time: 4 hours
- Cook Time: 20–25 minutes
- Category: Dessert