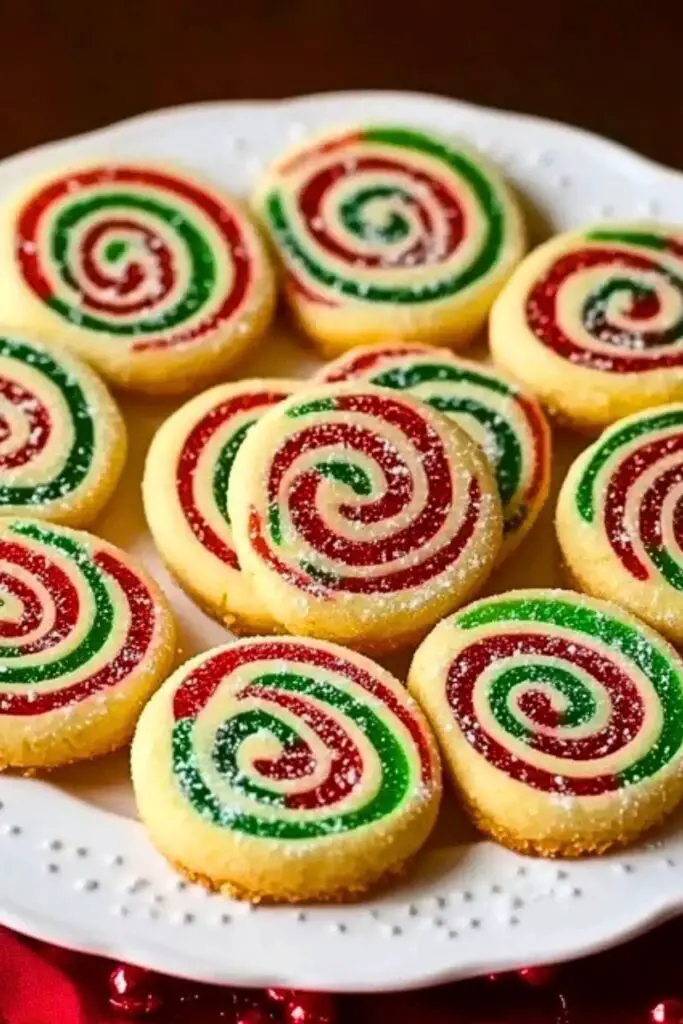
These festive Christmas Cookie Pinwheels are the ultimate holiday treat—eye-catching, buttery-soft, and melt-in-your-mouth delicious. Each cookie features a gorgeous red and green spiral nestled within a perfectly golden sugar cookie base, dusted delicately with powdered sugar for that fresh-snow sparkle. Whether you’re hosting a cookie swap, filling up Santa’s plate, or just enjoying a cozy winter day by the fire, these cookies bring the perfect balance of visual wow and classic homemade flavor.


What makes them truly special is how fun they are to make and decorate. The bright pinwheel design is achieved with simple food coloring and a little dough rolling magic—ideal for baking with kids or creating a show-stopping holiday dessert tray. Crisp on the edges and soft in the center, these cookies are as joyous to eat as they are to share.

Ingredients for Christmas Cookie Pinwheels
- 2 ¾ cups all-purpose flour
- 1 teaspoon baking powder
- ½ teaspoon salt
- 1 cup unsalted butter, softened
- 1 cup granulated sugar
- 1 large egg
- 2 teaspoons vanilla extract
- Red gel food coloring
- Green gel food coloring
- White icing (for outlining swirls)
- Powdered sugar (for dusting)
- Optional: sprinkles or edible glitter for extra holiday magic
Step 1: Make the Cookie Dough
In a medium bowl, whisk together the flour, baking powder, and salt, then set aside. In a large mixing bowl, cream the butter and sugar until light and fluffy (about 2–3 minutes with a hand mixer or stand mixer). Add the egg and vanilla extract, and beat until well combined.
Gradually mix in the dry ingredients, a little at a time, until a smooth, soft dough forms. If the dough feels too sticky, you can chill it for 15–20 minutes before dividing.
Step 2: Divide and Color the Dough
Split the dough into three equal parts. Leave one part plain (this will be your white layer). To the second part, add red gel food coloring, and to the third part, add green gel food coloring. Knead each portion until the colors are evenly distributed—wear gloves if needed to avoid staining your hands.
Wrap each dough portion in plastic wrap and refrigerate for at least 30 minutes to firm up, which makes rolling and stacking much easier.
Step 3: Roll and Stack the Dough
Roll each dough portion into a rectangle about ¼-inch thick between sheets of parchment paper. Carefully stack the layers: white on the bottom, red in the middle, green on top. Gently press the layers together using a rolling pin.
Trim the edges for clean lines, then slowly roll the stacked dough into a log shape (lengthwise), creating a spiral. Wrap the dough log in plastic wrap and chill it again for 1 hour or until firm enough to slice.
Step 4: Slice and Bake
Preheat the oven to 350°F (175°C). Line a baking sheet with parchment paper. Slice the chilled dough log into ¼-inch thick cookies and place them about 2 inches apart on the baking sheet.
Bake for 10–12 minutes, or until the edges are just lightly golden. Avoid overbaking to keep the cookies soft in the center.
Step 5: Decorate the Cookies
Once cooled, use white icing to trace the spiral pattern and enhance the pinwheel look. Lightly dust with powdered sugar and add festive sprinkles or edible glitter if desired. Let the icing set before serving or packaging.
Storage Instructions
To keep your Christmas Cookie Pinwheels fresh and festive:
- Room Temperature: Store in an airtight container for up to 1 week. Layer cookies with parchment paper to prevent icing from smudging.
- Refrigerator: If your home is warm or humid, store cookies in the fridge to keep icing intact. They’ll last about 10–12 days.
- Freezer (Baked): Freeze baked and decorated cookies for up to 2 months. Let them thaw at room temperature in a sealed container to avoid condensation ruining the decoration.
- Freezer (Unbaked): You can also freeze the dough log before baking. Wrap it tightly in plastic wrap and foil, and freeze for up to 3 months. Thaw slightly before slicing and baking as usual.
Estimated Nutrition (per cookie, approx. 1 of 24 cookies)
- Calories: 150
- Fat: 7g
- Saturated Fat: 4g
- Carbohydrates: 19g
- Sugar: 10g
- Protein: 1.5g
- Fiber: <1g
- Sodium: 70mg
(Note: Values may vary depending on exact ingredient brands and portion sizes.)
Frequently Asked Questions
1. Can I use natural food coloring instead of gel?
Yes, but gel colors are more vibrant and require less product. Natural alternatives might make the dough softer or duller in color.
2. Can I freeze these cookies after decorating them?
Absolutely. Just make sure the icing has fully set and layer parchment paper between each cookie to protect the designs.
3. Why did my pinwheel design blur when baking?
This usually happens when the dough is too warm or the layers weren’t chilled enough before slicing. Be sure to firm up the dough log well.
4. What’s the best icing for decorating the swirls?
A simple powdered sugar icing or royal icing works great. You can also use store-bought cookie icing for convenience.
5. Can I make the dough in advance?
Definitely! You can prepare the dough up to 3 days ahead, keep it chilled, and bake when ready.
6. Do I need to use a mixer for this recipe?
A hand or stand mixer makes the creaming step easier, but you can mix by hand with a bit more effort.
7. What kind of sprinkles work best?
Fine sanding sugar or edible glitter gives the most elegant finish, but holiday-themed sprinkles also add a fun touch.
8. Can I use this same dough for other shapes?
Yes! This dough is versatile. You can roll and cut it into stars, trees, or use it as a base for thumbprint cookies too.

Christmas Cookie Pinwheels
- Total Time: 0 hours
- Yield: 24 cookies
Description
Bring the magic of the holidays to your kitchen with these eye-catching Christmas Cookie Pinwheels. Perfect for festive gatherings, cookie exchanges, or simply as a cheerful treat for your family, these cookies are as joyful to look at as they are to eat. The vibrant red and green swirls in every bite-sized cookie evoke all the festive vibes, while the buttery sugar cookie base keeps things classic and comforting.
Whether you’re looking for quick Christmas dessert ideas, easy baking projects for kids, or new additions to your list of holiday food ideas, this is a recipe that delivers. With a balance of soft texture and rich flavor, plus an optional dusting of powdered sugar and decorative icing, these cookies are made to impress without being complicated. A must-try for your next winter baking day!
Ingredients
2 ¾ cups all-purpose flour
1 teaspoon baking powder
½ teaspoon salt
1 cup unsalted butter, softened
1 cup granulated sugar
1 large egg
2 teaspoons vanilla extract
Red gel food coloring
Green gel food coloring
White icing (for outlining swirls)
Powdered sugar (for dusting)
Optional: sprinkles or edible glitter
Instructions
- In a medium bowl, whisk together flour, baking powder, and salt.
- In a large mixing bowl, cream together butter and sugar until light and fluffy.
- Add the egg and vanilla extract; beat until smooth.
- Gradually add the dry ingredients into the wet mixture to form a soft dough.
- Divide the dough into three equal parts.
- Leave one part plain, color the second red, and the third green using gel food coloring.
- Wrap each portion in plastic wrap and chill for 30 minutes.
- Roll each dough color into a rectangle about 1/4 inch thick.
- Stack the layers: white, red, then green. Lightly roll to press together.
- Roll into a tight log, wrap, and chill for 1 hour.
- Preheat oven to 350°F (175°C). Line baking sheet with parchment paper.
- Slice dough log into 1/4-inch cookies. Place on baking sheet.
- Bake for 10–12 minutes or until edges are lightly golden.
- Cool completely. Decorate with white icing and dust with powdered sugar or sprinkles.
- Prep Time: 25 minutes (plus chilling time)
- Cook Time: 10–12 minutes per batch
- Category: Dessert

